We began a discussion of fonts for printing with this blog posting, where we talked about the different kinds of fonts that can be used for printing.
Most experienced creative professionals would probably agree that working with fonts could be one of the most problematic issues in working with graphics applications. There are a couple reasons for this:
• It’s common to have multiple fonts with similar names, which can get mixed up or be open simultaneously. If you choose the wrong font, type can reflow, or an incorrect character can appear.
• Until the advent of OpenType fonts, the file formats and character sets of Macintosh and Windows fonts differed. This would cause problems if you wanted to share your file with someone working on the other platform.
When fonts are discovered to be missing when an Adobe InDesign or Adobe Illustrator is opening, you’ll get a dialog (this is the one from Adobe InDesign).
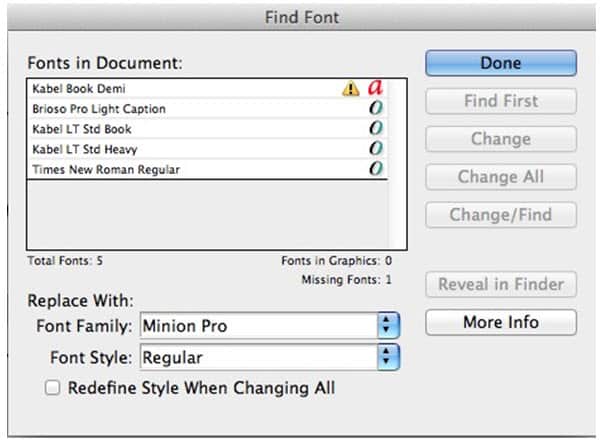
You are given the opportunity to open the correct font on your computer and the problem will be resolved. If you’re not sure what font is missing, both InDesign and Illustrator have Find Font dialog boxes that give you more information and let you choose a substitute font.
Adobe InDesign gives you the best information. It tells you what type of font is missing. If you click the More Info button (bottom right in the dialog), you can get more information about the font. If you use the Find First, Change, Change All and Change/Find buttons you can either observe the missing font and/or replace it.
InDesign also highlight,ts missing fonts by showing them with a pink background to make it easier to see where they are in your text.
Need help with your print? Talk to a live print expert today: 800-930-7978.

