For years, editing PDFs was discouraged. There were too many things that could go wrong. Ideally, edits are made in the original application to avoid any compatibility issues and the potential nightmare of keeping track of changes between formats.
But improvements to the PDF format (thanks to Adobe Acrobat’s ever-increasing functionality) in recent years has meant much more flexibility in editing workflow.
So which Adobe programs can you use to edit a PDF? Because other Adobe Creative Cloud programs like Adobe Illustrator can also save as the PDF file format, it’s understandable that you’d assume that “any CC program goes” when it comes to editing PDFs.
But while Adobe Illustrator is the gold standard of vector graphics programs, and while it can handle both graphics and type, it’s not a dedicated PDF editing application.
Yes, if you have a native Illustrator file and you’ve simply generated a PDF from that source file and checked “Preserve Illustrator Editing Capabilities” when saving it, you’re pretty much safe making additional edits in Illustrator.
Much of the time, though, Acrobat is the way to go.
Making PDF Edits in Adobe Acrobat
If you’re going to edit a PDF in Adobe Acrobat, launch Adobe Acrobat Pro and then open the file you need to edit.
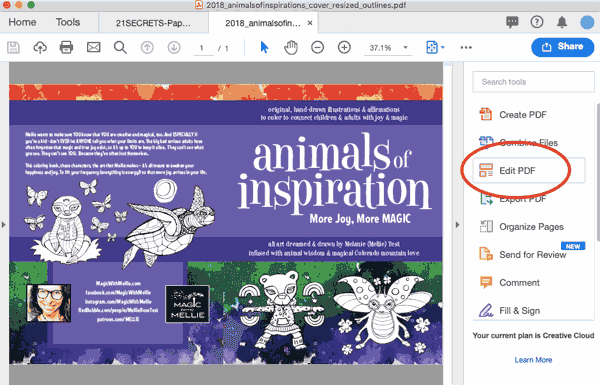
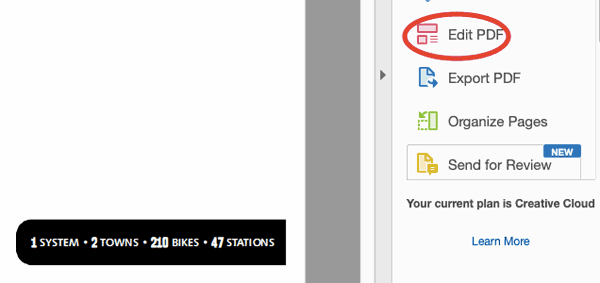
Once the PDF document you’d like to edit is open, you can either click “Edit PDF” in the right hand pane:
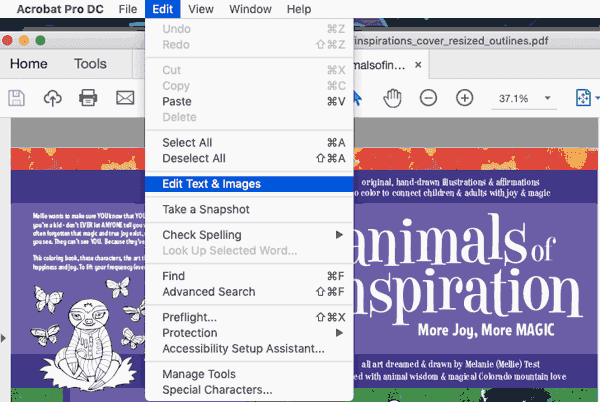
…or use the Edit menu to choose “Edit Text and Images” from the dropdown:
Now, you’ll see that bounding boxes have appeared around any sections of editable text.
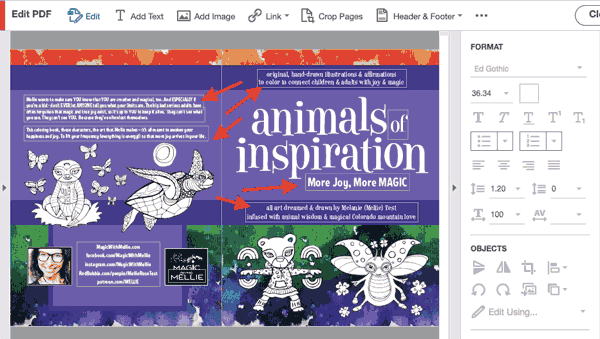
Once you select (click on or within) a bounding box, you’ll notice that the greyed-out text options are suddenly populated and active.
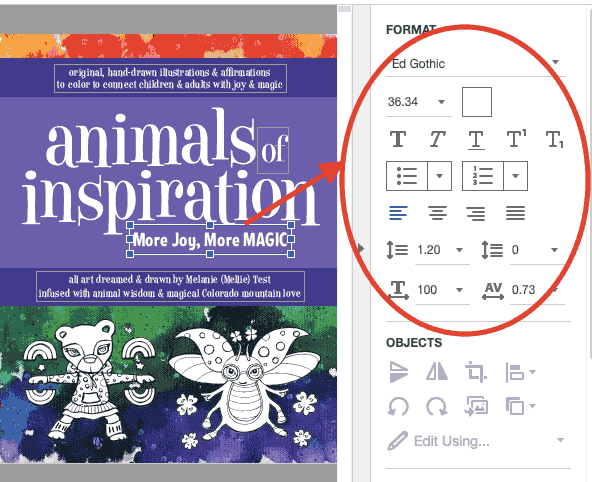
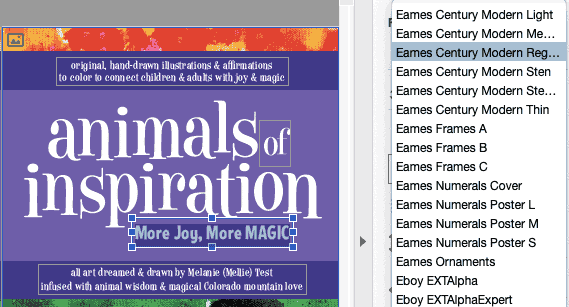
You can highlight the text you want to change and use the font dropdown to choose a new font.
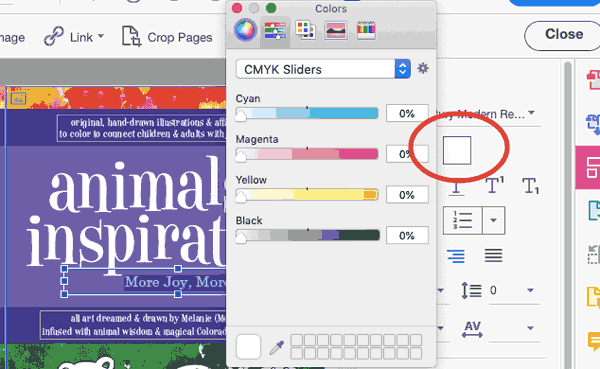
You can change the font size, the paragraph alignment, and the leading and line spacing. You can also change the color of the type by clicking the square next to the type size (which is in this case white because the text is white) and then moving the color sliders to get the new color you’ve chosen.
Adobe Acrobat Pro is a robust PDF editor and has numerous editing capabilities. That said, Acrobat hits a wall when it comes to editing vector and raster graphics. Acrobat alone isn’t the best choice if you want to edit images.
When your document images include vector artwork, Adobe Illustrator will be your best friend. You’re probably going to feel like you’re taking the long way around, but trust us. We’re going to give you the safest way to make spot changes and keep your document’s integrity intact.
How to Edit a PDF in Illustrator
What Adobe Acrobat can’t handle is complex graphic edits. The good news for us all is that, assuming you’re using the Adobe Creative Cloud, you’ll be able to make edits pretty seamlessly across the Adobe Cloud applications. Over the years, Acrobat has learned how to talk to Illustrator and Photoshop, and even when edits can’t be made directly in Adobe Acrobat Pro, the appropriate applications can be launched (and edits made) without ever closing your PDF file.
To get an idea of how seamless this process can be, first launch Adobe Acrobat Pro and then open a PDF that’s stored on your computer. Here, we’re opening a PDF cover spread for a coloring book. Once your document is open in Acrobat, click “Edit PDF” in the right hand panel.
Now that the edit functions have been activated, click around your document to select items that you might want to edit. As you do this, start to compare the available editing options. Notice that with some elements, the editing features in the right hand editing panel remain greyed out and inactive.
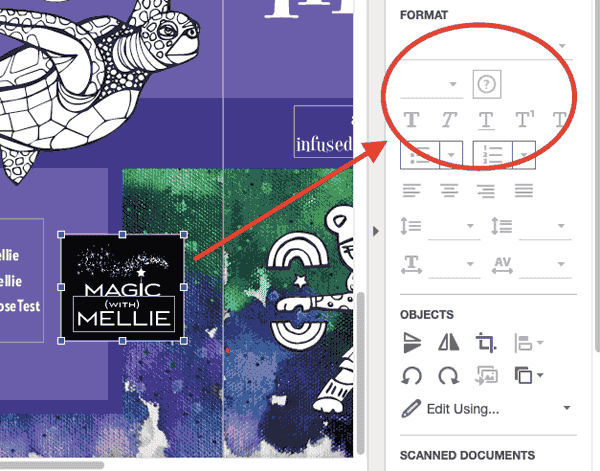
This is a case where, for vector graphics, Illustrator can come to your rescue.
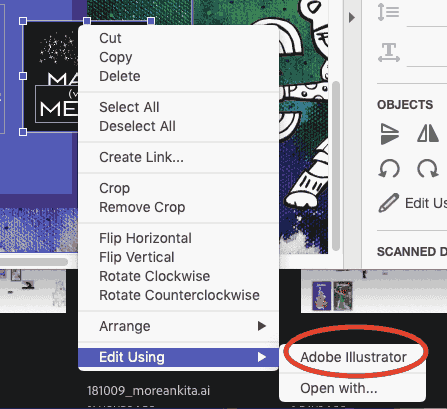
To edit any vector graphics in your PDF with the Illustrator program, first make sure a relevant graphic has been selected (click on the graphic to select it). Then, right-click on the graphic, or control-click on a Mac, go down to “Edit Using” and choose “Adobe Illustrator” from the flyout.
(
Note: you may see a warning dialog box. If you accept the risks, then go ahead and proceed. Please click “Yes.”
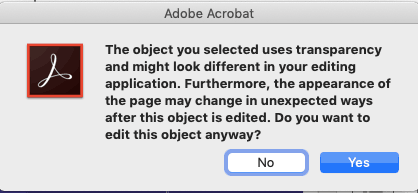
If Illustrator isn’t already open on your computer, it will now automatically begin to launch, and a document containing the graphic you’ve chosen to edit will open within the Illustrator interface. What has happened is that you’ve now extracted editable content from Adobe Acrobat.
You’ll probably notice that the artboard looks huge — it’s taken on the dimensions of your Adobe Acrobat file, and your editable artwork has also carried over its same positioning within the larger artboard space.
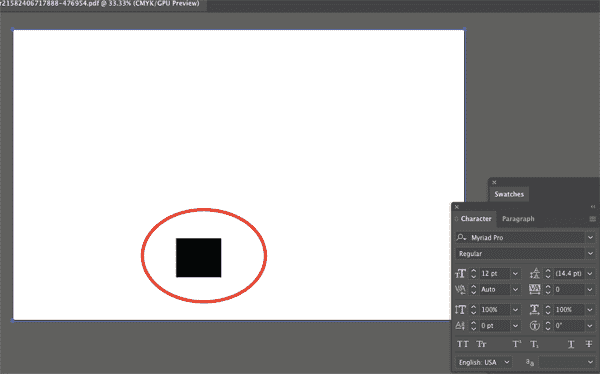
The size of this artboard is extremely important. Keeping these artboard dimensions will ensure that any edits you make in Illustrator will seamlessly be written back into your Acrobat file.
Don’t change the bounding box, either, if you want your positioning to stay intact within the original PDF. (Yes, there’s a lot going on here, but as long as you take the proper steps, your artwork and files — and all your hard work — will be safe.)
You also may notice that when Acrobat launched Illustrator, it created a new file with a crazy name made up of random letters and numbers. The file that has been generated and appears in Illustrator is is called a “touch up file,” and only exists in your computer’s memory. This means it’s not saved locally at the moment (but can be, of course, with the File → Save As command).
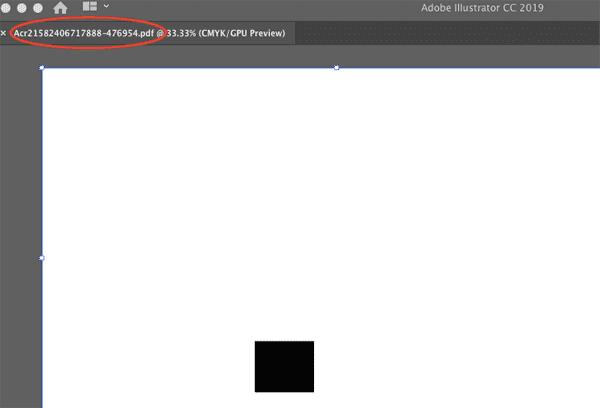
From within Illustrator, go ahead and make your changes to this touch up file.
We’re going to change the color of this logo background box.
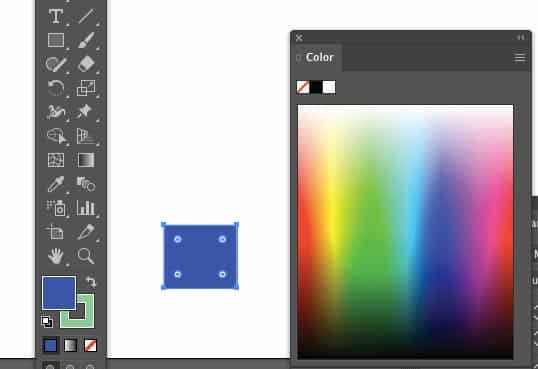
You may notice some odd behavior when you’re making your changes. Because we’re communicating back and forth between two programs, that’s totally normal — it just takes some getting used to.
When you’re done with your vector edits and ready to head back to Acrobat, you’ll go to File → Save. Remember, you’re in the touch-up file, so you’re saving these changes right back into Acrobat, NOT onto your hard drive.

Do note that if you think you might need your changes on their own for use in the future, you can also choose File → Save As and create a standalone vector file, saved on your hard drive.
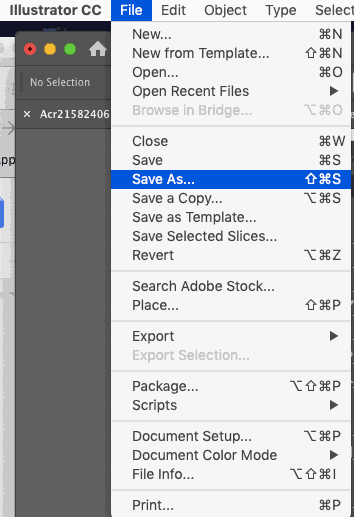
For our current purposes, though, simply saving will immediately export your changes back into your Acrobat document without requiring any additional steps.
Here’s a summary of the steps if you need to harness Illustrator’s vector editing power:
- Open your PDF file in Adobe Acrobat.
- Choose “Edit PDF” from the right hand panel.
- Select the vector artwork you’d like to change.
- Right- (or control-) click and edit using Adobe Illustrator.
- Make your changes to the graphic without changing anything else about the touch up document as launched.
- Save your changes.
- Confirm your changes in your open Acrobat document.
How to Edit PDF Text in Illustrator
If you’re going to edit text in a PDF, it’s usually best to stick with Adobe Acrobat. As we mentioned earlier, Adobe Illustrator is more dedicated to graphics (specifically, vector artwork).
That said, if you’re going to open your PDF file in Illustrator to edit the text, you can go to File → Open and select your PDF file. Then, if it’s a multi page PDF, you can choose the page range you’d like to open.
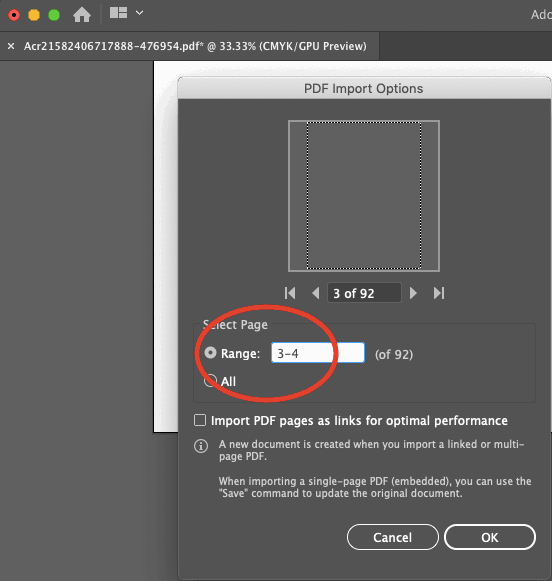
Once the pages are open, you can click on the text. On this particular document, you’ll see that the text isn’t editable, because it was converted to outlines in Illustrator before the PDF file was generated.
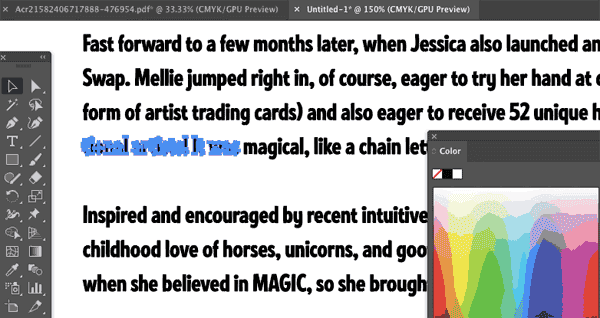
If this is the case and you still want to edit the text, you’ll need to have the original font on your computer and retype it.
If your text is editable, though, you’ll see a line or a text box appear when the text is selected, instead of individual letter shapes.
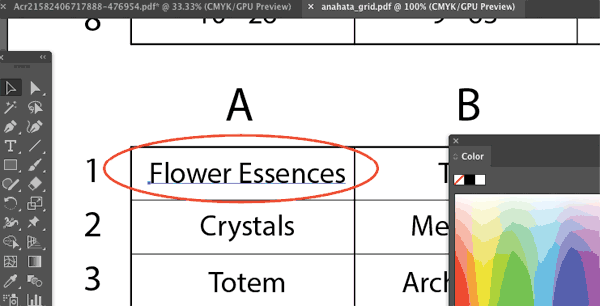
In that case, make the text changes you need and then re-save the PDF file. Make sure it’s saving as a PDF and not an .AI file when you do this.
If you need help with getting your project ready for print, PrintingForLess can help! Learn more and place your order with Printing for Less here.
Need help with your print? Talk to a live print expert today: 800-930-7978.
