In my previous two blog posts, I talked about the usefulness of saving PDF files in Photoshop and Illustrator, and how you could choose the best PDF presets.
While the default settings are good for many purposes, there are times when you might want to customize them. I can’t go into all the reasons you might want to do that, but I’ll give you an example.
I mentioned last time that the High Quality Print PDF preset, found in both Photoshop and Illustrator, is good for high-quality printing on desktop printers and proofers.
However, the default resolution is set very high—300 ppi for both color and grayscale images. Many desktop printers don’t require that much resolution, and, if you have a larger image or document, you might want to set that lower.
The way you customize a PDF presets differs somewhat between Photoshop and Illustrator. Here’s the Adobe Illustrator method:
.
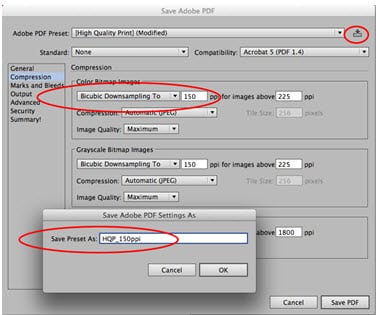
Start with the PDF preset you want to modify. Choose the settings you want to change. Here I reduced the downsampling on the Compression panel to 150 ppi for color and grayscale images. Click the button to the right of the preset. Then name your new preset.
Here’s the Photoshop method:
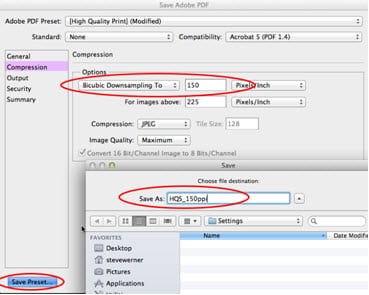
Start with the PDF preset you want to modify. Choose the settings you want to change. Here I reduced the downsampling on the Compression panel to 150 ppi. Click the Save Preset button to the bottom left of the dialog. Then name your new preset.
Need help with your print? Talk to a live print expert today: 800-930-7978.


