Color is a big topic. And there’s a difference between on-screen color and in-print color, which is most important to remember (and troubleshoot) if you’re going to print.
As graphic designers working between multiple platforms and applications, we can sometimes forget which mode we’re working in, or which colors have been applied where. The outcome? We can get results we’re not expecting when we send our files to the printer.
We don’t want that to happen to you. And one way to prevent any unexpected color results is to preview the print output before we send our files out the door (or email box). It’s wise to check the settings for the actual inks and make sure they’re going to interact in a predictable and satisfying way, for both you and your client.
The Separations Preview tool provides you with a visual display of how the various color inks in your document will interact with each other on the printed page. You’ll only need this panel if you’re going to be doing any commercial printing; if you’re sticking to your home printer (laserjet, inkjet, and the like), you won’t need to bother with separations. The Color Separations Preview will help you prep your files when you’re sending your job to a professional print house.
Since both Adobe Illustrator CC and Adobe InDesign CC are popular print layout powerhouses, we’ll focus on the Separations Preview in these applications. This way, you’ll be prepared for how the various process colors will interact with each other when you commercially reproduce an Adobe document.
Launch Separations Preview in Illustrator
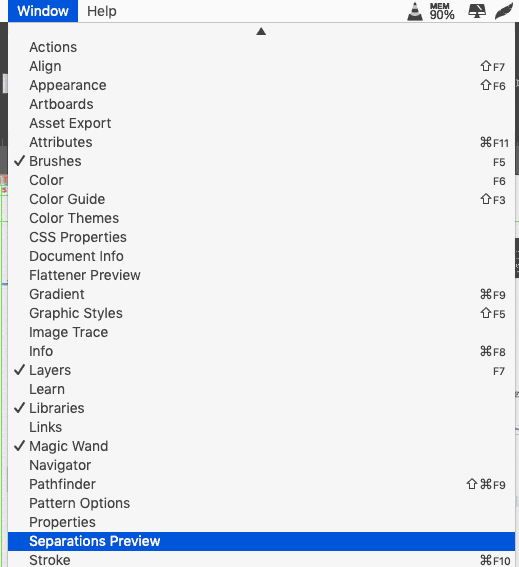
Here’s how to launch Separations Preview in Illustrator. Go to Window → Separations Preview to launch the Separations Preview Panel.
If the panel seems to be empty, check to make sure your document is in CMYK color mode. While you don’t have to work in CMYK just because you’re printing a document commercially (especially when using spot colors, which exist independently of the CMYK plates), you won’t be able to use the Separations Preview unless you are.
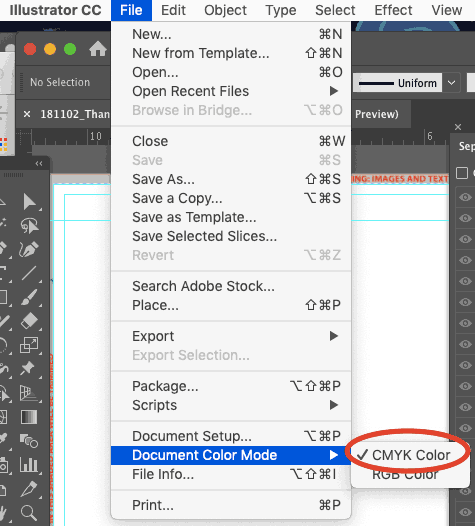
You can check your color mode by going to File → Document Color Mode. Make sure there’s a check next to “CMYK Color.” If “RGB Color” is checked instead, then change it to CMYK.
Be aware that the saturation of the colors on your screen will become more muted if you make the change to CMYK, since RGB is considered a more “lively” color space than the printed page allows. In fact, if you have a document that only uses spot colors and no process color plates, some designers believe they can see the spot colors better if they leave the document in RGB. It’s your choice; just be aware of the pros and cons of each!
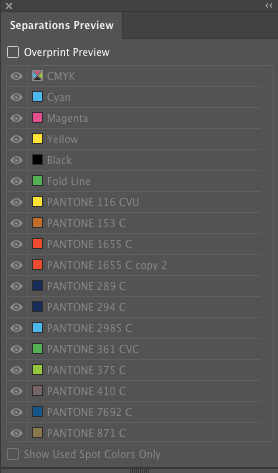
What you should see, once your document is in CMYK color mode, is a list of the four process color inks (cyan, magenta, yellow, and black) along with any spot colors which exist in your swatches panel. Spot colors are premixed inks which don’t separate into the process components.
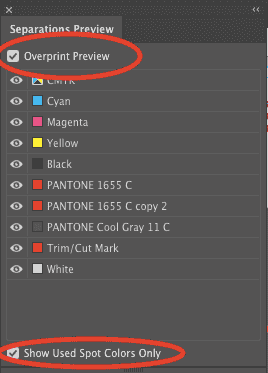
To activate the actual separations preview, you’ll need to check the box next to “Overprint Preview.” Overprinting relates to how the inks interact; because they’re translucent, when each ink is printed on top of the others, you’ll a deeper visual range.
After that, you can decide whether you still want to see all the spot colors that have been defined, or only the spot colors actively in use. If the latter, check the “Show Used Spot Colors Only” box at the bottom of the Separations Preview Panel.
Note that nothing that you change in the panel will affect the actual print job; turning any of these checkboxes on or off simply allows you to see what will visually happen as the various colors interact.
In order to preview any one ink by itself, use the keyboard shortcut Alt + click (PC) or Option + click (Mac) while clicking the eye on the left side of the color indicator. You’ll then see a preview of all of the places in your document where that ink will be printed (where that color plate will be used). Here, we’re previewing the black plate only:
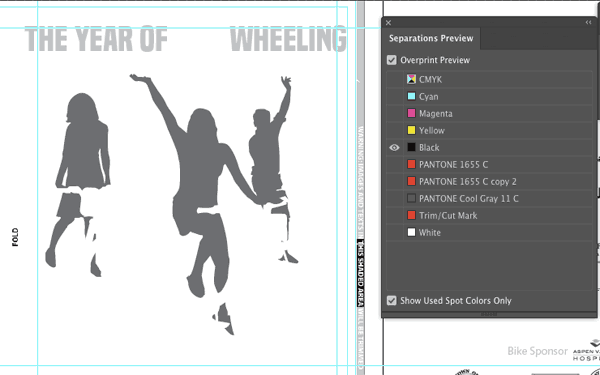
To restore the visibility of all the inks, simply Alt- or Option-click again next to any ink swatch.
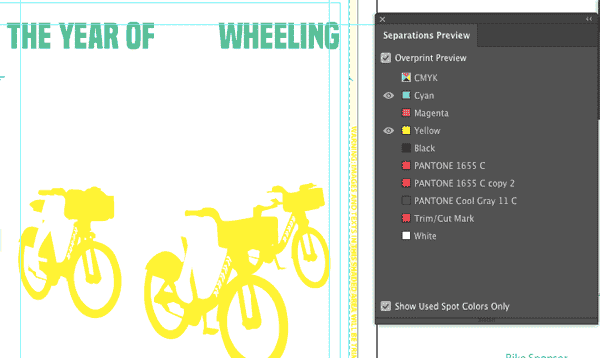
You can also toggle inks one by one to see different combinations of interaction. In this image, for example, the interaction of just the cyan and yellow inks are being previewed.
Using the Color Separations Preview in Adobe InDesign
Now that we’ve covered separation previews in Adobe Illustrator, do you want to know how to preview color separations in InDesign, too? We’re not covering how to actually print color separations in InDesign, but the Separations Preview panel will give you good information so that you can make sure your separations are set up correctly before actually going to print.
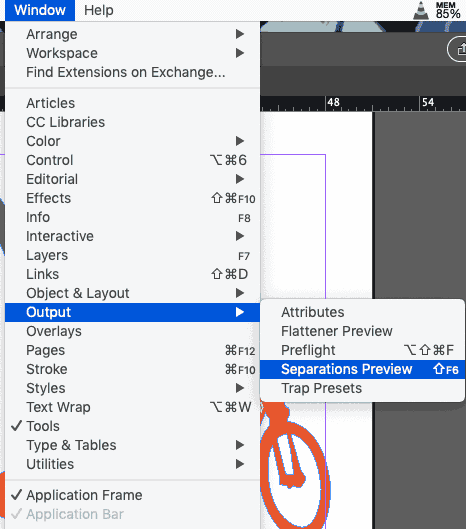
Assuming you’ve already got an InDesign document open, you’re ready to make sure the right inks will end up in the right places when you print your InDesign file commercially. To launch the Color Separations Preview, go to Window → Output → Separations Preview.
When you first launch the Separations Preview panel, you won’t see much, but if you click the “View” panel menu, you’ll get to choose your display options.
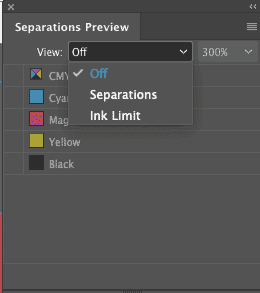
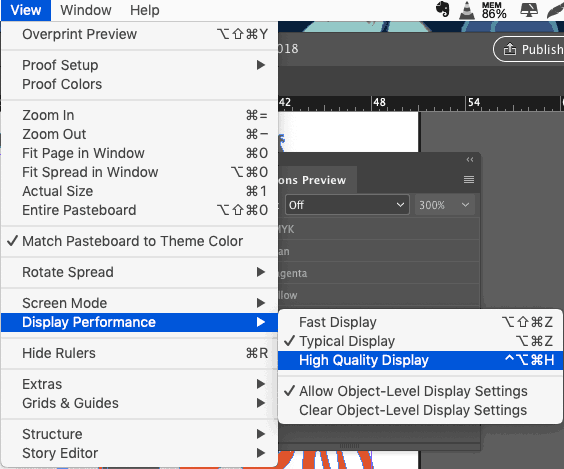
When you choose “Separations” from the dropdown, InDesign will activate “High Quality” display for the entire document (which you could also manually activate by going to View → Display Performance → High Quality Display).
It will also show you a list of all the inks (not color swatches, but the actual inks) used in your file.
Would you like to see how much of each ink is being used in various places throughout your document? Simply move your cursor around your document, and notice that the percentages change in real-time to the right of each ink/plate in the Separations Preview panel.
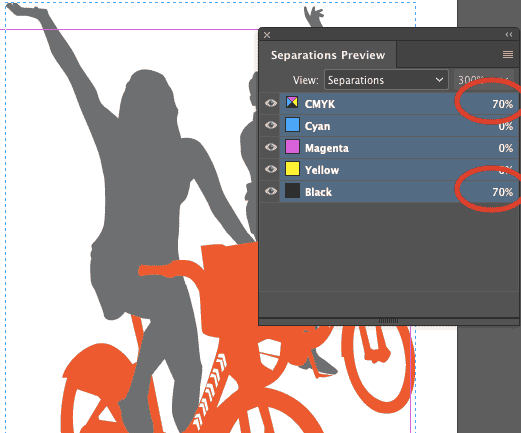
You get to see exactly how much ink is set to be applied at any and every point in the document.
With this level of feedback from InDesign, you’re really able to make sure your files are set up perfectly before sending them along to the printer. The visual nature of this kind of troubleshooting makes it easy to catch color assignment errors, and your printer will be grateful! Your clients will be grateful, too, when perfectly printed pieces arrive on their doorsteps.
Now, let’s actually look at color separations. We’ll be able to see exactly which colors are applied to exactly which objects on your page, and in which densities.
Click on any color (magenta, in this example) to see what exists on that particular color plate — literally, what that color plate will look like
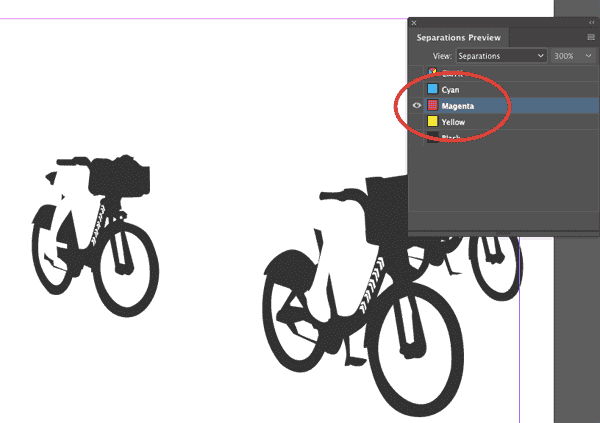
By turning on and off the various colors (by clicking on the eyeballs on the left), we get what’s called a “color build” — we can see various plates combined, and add more plates gradually to build up the cumulative ink density.
At first glance, this may not seem particularly useful, but a cyan-magenta-yellow color build can help you identify text, for example, that should be black but isn’t. If you have cyan, magenta, and yellow all turned on (but black turned off) in the Separations Preview panel and then go through your document page by page, you’ll immediately see items that should be black but aren’t.
If you have the black plate turned off but still see “black” text, that’s your a red flag! To remedy any non-black text or objects that should be black (and not a combination of the other process colors), first, select them. Then, open the Swatches palette, and click the black process swatch to assign that text or those objects to that plate.
